In a nutshell
- The ideal aurora setup includes a DSLR or mirrorless camera, a wide and fast lens, a sturdy tripod, spare batteries, and manual control over aperture, ISO, and shutter speed so you can react quickly as the lights change brightness and speed.
- The best camera settings depend on aurora intensity: faint displays often need 10 to 20 seconds and higher ISO, while strong, fast-moving aurora usually looks better with 1 to 5 second exposures that preserve structure and avoid turning the sky into a soft blur.
- Good composition makes a major difference, so include mountains, cabins, trees, roads, or reflections whenever possible to add scale and place, instead of shooting only the sky without context or depth.
- Phones can photograph the northern lights too, especially newer models with night mode or manual controls, but results improve dramatically when the device is stabilized, the main lens is used, and exposure settings are kept realistic for the available light.
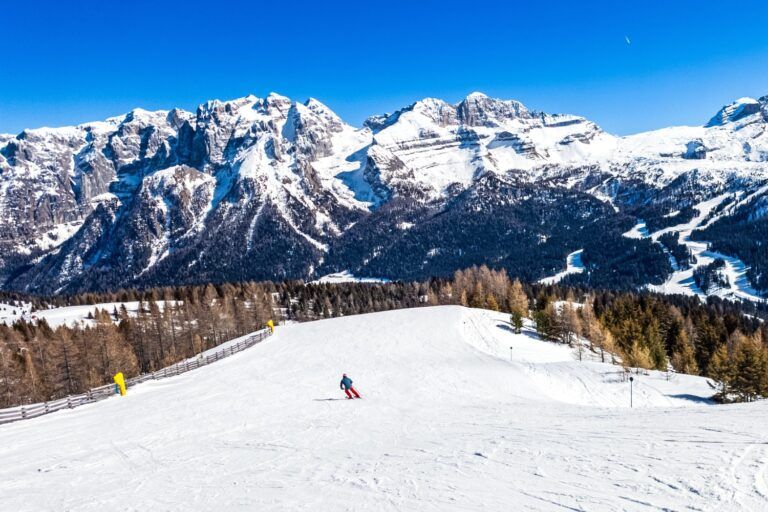
- The best locations combine dark skies and strong scenery, with Iceland, northern Norway, Finnish and Swedish Lapland, Alaska, and northern Canada standing out for reliable aurora visibility and photogenic landscapes.
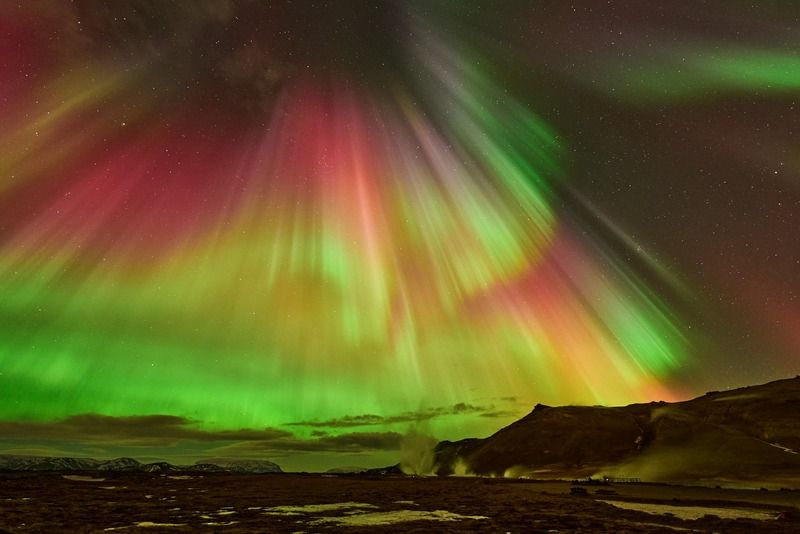
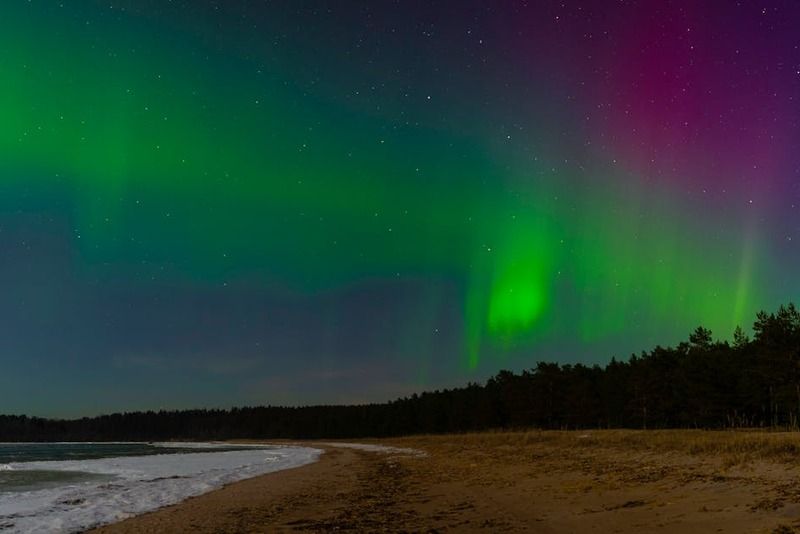
Few travel moments feel as unreal as watching green ribbons twist across a dark Arctic sky. It is one of those scenes that makes everyone go quiet for a second, then immediately fumble for a camera with frozen fingers. If you are wondering how to photograph northern lights without ending up with blurry green soup, the good news is that it is easier than it looks with the right setup.
The challenge is not just the darkness. The aurora changes brightness, shape, and speed in seconds, so good results come from preparation more than luck. A little planning, a stable tripod, and the right settings can turn a once-in-a-lifetime sight into a photo you will actually want to print instead of hide in a forgotten folder called “misc winter stuff.”
What you need before you start
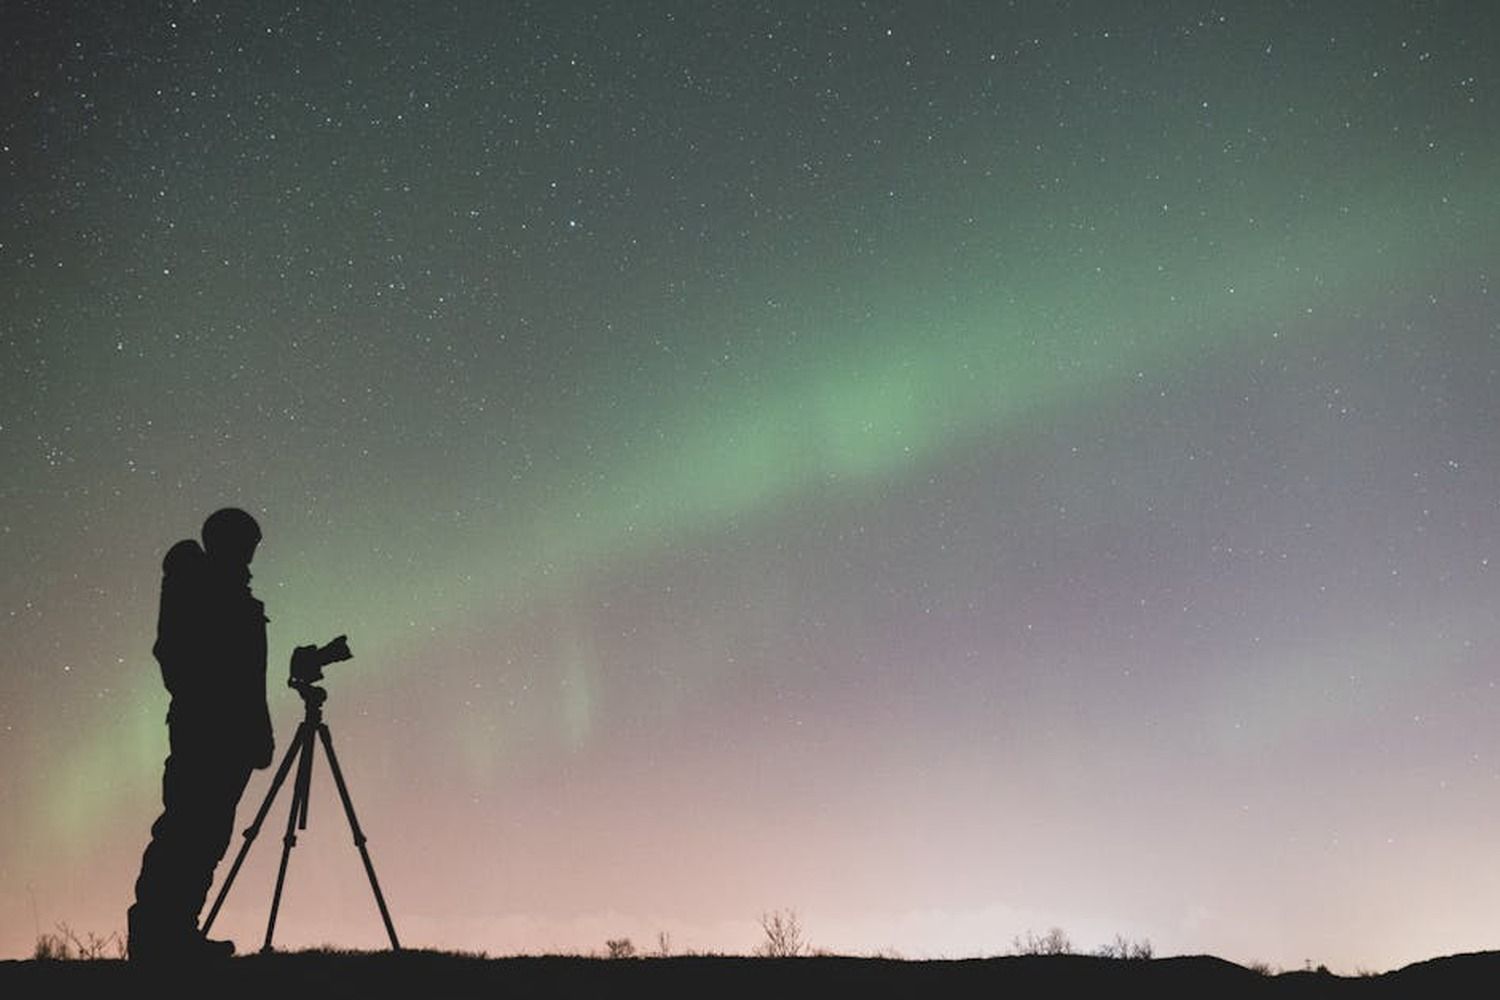
To photograph the aurora well, you need a camera or phone that performs decently in low light, a stable support, and enough manual control to react to changing conditions. The best results come from planning ahead, knowing your gear, and choosing a dark location with clear skies.
You do not need to arrive dressed like a polar explorer who has just been sponsored by five outdoor brands, but a few essentials matter a lot. The aurora is unpredictable, and cold weather is ruthless on both batteries and patience.
- Camera: DSLR or mirrorless with manual mode is ideal.
- Lens: A wide-angle lens, preferably f/2.8 or faster.
- Tripod: Non-negotiable. Handheld aurora shots are usually a one-way ticket to blur town.
- Remote shutter or timer: Helps reduce camera shake.
- Spare batteries: Cold drains them quickly, like your motivation when your gloves stop working.
- Headlamp with red light: Useful without blinding everyone nearby.
If you are still planning your trip, it helps to understand both timing and the science behind the phenomenon. For that, read the best time to see the northern lights and what the northern lights are and what causes them.
Best camera settings for northern lights
The best setting to photograph the aurora usually starts with a wide aperture, mid-to-high ISO, and a shutter speed short enough to preserve movement. A strong display needs faster exposures, while faint aurora often requires longer ones. Manual focus and RAW format are strongly recommended.
There is no single magic formula because the aurora behaves like it has had too much espresso. Still, these starting points work well for most situations.
Recommended starting settings
A reliable baseline helps you get your first usable image fast. From there, adjust based on how bright and how fast the lights are moving. Shorter exposures preserve detail in active aurora, while longer ones help capture faint displays.
| Condition | Aperture | Shutter speed | ISO |
|---|---|---|---|
| Faint aurora | f/1.8 to f/2.8 | 10-20 sec | 1600-3200 |
| Moderate aurora | f/2 to f/2.8 | 5-10 sec | 1000-2500 |
| Strong, fast-moving aurora | f/1.8 to f/2.8 | 1-5 sec | 1600-4000 |
Keep these principles in mind:
- Use the widest aperture your lens allows.
- Shoot in RAW for easier editing later.
- Start around ISO 1600 and adjust after reviewing the histogram.
- Avoid very long exposures when the aurora is dancing quickly, or it will lose shape.
Focus, white balance, and file format
Sharp focus matters more than almost any other setting. Autofocus often struggles in darkness, so manual focus is the safest choice. White balance can be adjusted later if you shoot RAW, but setting it manually gives you more consistent previews while shooting.
Use this quick checklist:
- Switch to manual focus.
- Focus on a bright star or distant light.
- Zoom in on the preview to confirm sharpness.
- Set white balance around 3500K to 4000K.
- Turn off image stabilization if the camera is on a tripod.
And yes, check focus more than once. Nothing hurts quite like discovering your best aurora frame is softer than hotel mashed potatoes.
How to compose better aurora photos
A strong aurora image needs more than a colorful sky. Adding a clear foreground gives scale, depth, and a stronger sense of place. Mountains, cabins, frozen lakes, and reflective water often turn a technically good image into a memorable one.
If you point your camera straight up and only capture green squiggles, the result may still be pretty, but it often lacks context. A great photo tells the viewer where you were and what it felt like to stand there with numb toes and childlike joy.
Look for:
- Reflections in lakes, fjords, or wet sand
- Silhouettes of trees, peaks, or people
- Simple foreground subjects like a hut, road, or snow-covered rocks
- Leading lines that draw the eye toward the sky
Scout locations in daylight if possible. At night, everything looks either magical or mildly suspicious, and it is much easier to compose when you already know the terrain.
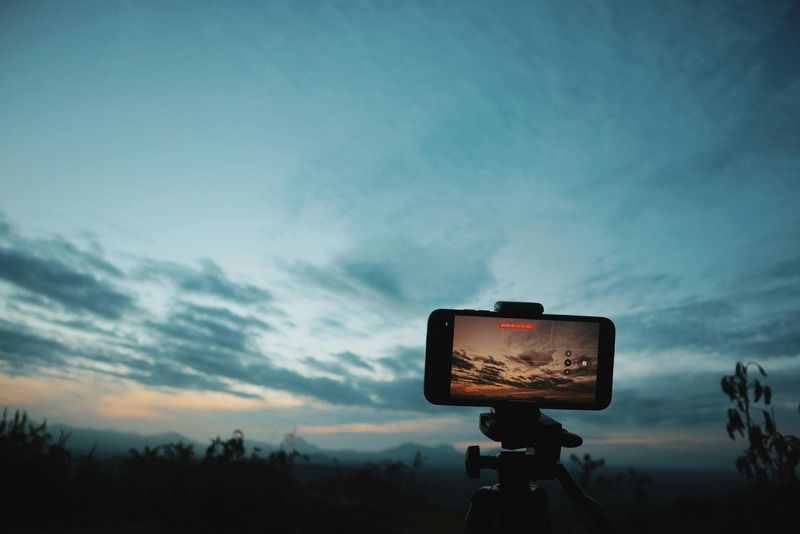
Can you photograph northern lights with a phone?
Yes, you can take pictures of the northern lights with a phone, especially with newer devices that include night mode or manual controls. Results improve dramatically when the phone is stabilized, the aurora is bright, and you avoid digital zoom and excessive movement.
Modern smartphones are surprisingly capable, but they still benefit from a little help. If your plan is to wave your phone around one-handed while saying “wow” every four seconds, your results may be more emotional than sharp.
Phone tips that actually help
Phones capture aurora best when they are kept steady and allowed to gather light over several seconds. Manual or night settings can improve detail, while a tripod or fixed surface reduces blur and makes exposure more reliable.
- Use a tripod or brace the phone against a stable surface.
- Enable night mode or pro/manual mode.
- Use the main 1x lens, which usually performs best in low light.
- Set exposure between 3 and 10 seconds if manual control is available.
- Try ISO around 800 to 1600 and adjust as needed.
- Use a timer or remote trigger to avoid shake.
For iPhone users, the most useful approach is simple: use Night mode, stabilize the phone, keep the main lens selected, and let the phone extend exposure as much as possible. If available, lock focus on a distant subject and avoid zooming in digitally.
How to use your camera to see the aurora more clearly
Your camera sensor can often detect aurora before your eyes fully do, especially during faint activity. A test shot with high ISO and a longer exposure may reveal green or pink tones in the sky that look nearly invisible to the naked eye.
This is a handy trick when you suspect activity but are not sure. Set your camera to something like f/2.8, 10 seconds, ISO 3200 and take a quick test frame. If the image shows color and structure, congratulations: your camera has just become your slightly overachieving aurora scout.
This also helps when deciding where to point the lens. In mid-latitudes, the lights may appear low on the northern horizon, while in places like Iceland, northern Norway, or Lapland, they can stretch overhead.
Best places to photograph the northern lights
The best aurora photography locations combine dark skies, frequent geomagnetic visibility, accessible winter travel, and strong foreground scenery. Iceland, northern Norway, Swedish Lapland, Finnish Lapland, Alaska, and northern Canada are among the most reliable choices.
Not every great aurora destination is equally easy for photographers. Some are easier for road trips, others offer dramatic mountains, and some win for comfort when your fingers are considering early retirement.
| Destination | Why it is great | Best for |
|---|---|---|
| Iceland | Epic landscapes, waterfalls, black sand beaches | Wide scenic compositions |
| Northern Norway | Fjords, mountains, strong aurora activity | Dramatic foregrounds |
| Finnish Lapland | Forests, frozen lakes, easy winter stays | Beginners and cozy trips |
| Swedish Lapland | Dark skies, snowy wilderness, low light pollution | Quiet remote shooting |
| Alaska | Excellent aurora visibility and huge open skies | North America travelers |
| Yukon and northern Canada | Very dark skies and strong auroral oval access | Serious aurora chasing |
Practical tips for shooting in the cold
Cold weather affects batteries, dexterity, lens fogging, and your ability to make smart decisions after midnight. Planning for comfort and safety improves both your experience and your photos. Warm clothing and extra batteries are as important as camera settings.
You may be chasing a celestial masterpiece, but your body is still just a human body standing in sub-zero darkness asking difficult questions like, “Why are my socks now theoretical?”
- Keep spare batteries in an inside pocket.
- Use thin gloves under warmer mittens for camera control.
- Avoid breathing directly on the lens or viewfinder.
- Bring a thermos. Morale matters.
- Let gear warm up slowly indoors to reduce condensation.
Common mistakes to avoid
Most failed aurora photos come from a few predictable issues: missed focus, too-long exposures, camera shake, and poor composition. Avoiding these simple mistakes gives you a much better chance of returning with sharp and balanced images.
- Using autofocus in the dark and trusting it blindly
- Exposing too long during fast aurora movement
- Ignoring the foreground and shooting only empty sky
- Forgetting to check settings as the display changes
- Staying near city lights when darker spots are available
The best tip of all is also the simplest: review your photos as you go. The aurora changes quickly, and the settings that worked five minutes ago may suddenly turn your next frame into a glowing green lasagna.
Make the night count
Photographing the aurora is a mix of timing, technique, and patience. Start with a wide lens, manual focus, a sturdy tripod, and flexible settings. Then adjust constantly as the sky changes, and remember to look up from the screen often enough to enjoy the real show.
The photos matter, of course. But so does the moment when the sky suddenly starts moving and everyone nearby falls silent. That part does not need editing, presets, or a better ISO strategy.
If you want to experience this properly, with the right itinerary and a group equally ready to chase the sky at odd hours, discover the WeRoad group trips for northern lights destinations.
FAQ
- What is the best setting to photograph the northern lights?
-
A good starting point is f/2.8, ISO 1600, and 5 to 10 seconds. Then adjust depending on aurora brightness and movement. Faster aurora needs shorter exposures, while faint aurora usually needs longer ones.
- Can you take pictures of the northern lights with a phone?
-
Yes, especially with newer smartphones that offer night mode or manual controls. Use a tripod or stable surface, avoid zooming, and let the phone gather light over several seconds.
- How do I adjust my iPhone camera for northern lights?
-
Use the main 1x lens, enable Night mode, stabilize the phone on a tripod, and allow the longest practical exposure. If available, lock focus on a distant point and use a timer to avoid shake.
- How do I use my camera to see the northern lights?
-
Take a test shot using a wide aperture, higher ISO, and a longer shutter speed. Cameras can often reveal faint aurora colors that are hard to notice with the naked eye, especially early in a display.
- Is RAW necessary for northern lights photography?
-
RAW is strongly recommended because it preserves more detail, gives better control over white balance, and makes it easier to reduce noise and recover highlights during editing.
- What lens is best for aurora photography?
-
A wide-angle lens with a fast aperture is best. Something in the 14mm to 24mm range on full frame, ideally at f/2.8 or faster, gives you a broad view of the sky and better low-light performance.